

You can stop coming over the top in your golf swing by focusing on your transition and elbow position: keep your trail elbow tucked close to your body as you start the downswing, which automatically drops the club onto an inside path instead of cutting across the ball from outside-in. This single adjustment addresses the root cause of slices, pulls, and that dreaded weak fade that robs you of distance and accuracy.
Coming over the top is one of the most common swing faults in golf, affecting players of all skill levels. If you’ve ever watched your ball start left and slice right (for right-handers), or felt like you’re chopping down on the ball with a steep, glancing blow, you’re likely making this mistake. The good news is that correcting it doesn’t require rebuilding your entire swing. Specific drills targeting your transition, wrist position, and body sequencing can create lasting change on the course.
PGA instructors including Andrew Reynolds, recognized among Golf Monthly’s Top 50 Coaches, emphasize that understanding the feel of a proper inside path is just as important as knowing the mechanics. Michael Breed and other leading instructors demonstrate proven drills that give you immediate feedback, whether you’re practicing at home, on the range, or even in your backyard. The following seven drills are ranked by effectiveness and designed to address different aspects of the over-the-top pattern, giving you multiple entry points to solve this frustrating problem.
Understanding the Over-the-Top Swing Pattern
When a golfer comes over the top, the club moves too far outside on the downswing, crossing the ideal swing plane from an outside-to-in path. This fundamental flaw disrupts the proper sequence of movement, causing the hands and club to move away from the body rather than dropping down and inside. The result? Weak contact, loss of distance, and frustrating ball flight patterns that rarely find the fairway.
The clearest visual cue is the trail elbow. If your elbow is out away from your body at the start of the downswing, the club is coming over the top. Instead of tucking close to your side, the elbow flares outward, forcing the club onto a steep, outside path. This position makes it nearly impossible to approach the ball from inside the target line.
Understanding a few core concepts helps clarify what’s happening in your swing:
- Swing Plane
- The imaginary tilted circle the club travels on throughout the swing, ideally matching the angle set at address. Deviation above this plane on the downswing signals an over-the-top move.
- Inside Path
- The club approaching the ball from behind and inside the target line, creating a shallow delivery angle. This path promotes solid contact and controlled ball flight.
- Downswing Sequence
- The proper order of movement from the ground up, hips rotate first, then torso, then arms and club. Breaking this chain by starting with the arms creates the over-the-top pattern.
- Club Face Angle
- The direction the club face points at impact relative to both the target line and the swing path. An open face combined with an over-the-top path produces the classic slice.
The ball flight tells the story. Golfers with this pattern typically see shots that start left of target and curve sharply right (for right-handed players). Some experience weak pull shots when the face closes relative to the outside path. Either way, power leaks away and consistency becomes elusive. Recognizing these mechanics sets the foundation for applying the correction drills that follow.
How We Ranked These Drills
We ranked these seven drills by weighing four practical factors that matter when you’re actually working to fix your swing. First, ease of understanding, how quickly you can grasp what the drill asks you to do without endless instruction. Second, immediate feedback, whether you can feel or see the correction working right away, which accelerates learning. Third, practice versatility, does the drill require specific equipment or space, or can you rehearse it at home, on the range, or during a round. Fourth, alignment with proven teaching methods, we drew on approaches demonstrated by instructors like Michael Breed, PGA professionals Kerrod Gray and Toby McGeachie, and Top 50 Coach Andrew Reynolds, whose methods emphasize tangible swing path changes rather than abstract theory.
That said, no single drill works identically for every golfer. Your individual swing characteristics, shoulder turn depth, hip mobility, grip strength, tempo, shape which correction feels most natural and produces the fastest results. The top-ranked drills tend to deliver quick wins for the majority of golfers, but you may find a lower-ranked drill clicks better with your movement pattern. Experiment with the first two or three, notice which gives you clearer ball flight improvement, then build your practice around that drill.
1. The Elbow Tuck Drill: Instant Path Correction

The elbow tuck drill ranks first because it delivers the most immediate path correction for golfers fighting an over-the-top move. When your trail elbow moves away from your body during the downswing, the club inevitably swings outside the ideal plane, that outward position signals the club is coming over the top. Tucking your elbow in against your ribcage instantly puts the club on the correct inside path instead.
Start your setup in your normal address position. As you swing to the top, focus on keeping your trail elbow pointed toward the ground rather than flaring behind you. The crucial moment comes at transition: consciously feel your trail elbow drop and tuck toward your side as you begin the downswing. This tucking sensation should happen before your hands move down, creating the proper sequence that prevents casting over the top.
The feel cue many golfers find helpful is imagining you’re pinning a towel under your trail armpit throughout the downswing. Some instructors actually place a towel there during practice so you get instant feedback, if it drops, your elbow moved away from your body. This drill works exceptionally well because the correction is binary: either your elbow stays connected or it doesn’t. You’ll feel the difference in club path immediately, often within five or six swings.
The elbow tuck naturally coordinates with proper weight transfer and body rotation. When your elbow stays connected, your arms and body work together rather than the arms racing ahead independently, which is the root cause of most over-the-top swings.
2. Hands to the Pocket Transition Drill
The hands-to-pocket drill works by interrupting your brain’s natural impulse to throw the club outward at the start of the downswing. Instead of letting your hands push away from your body, the hallmark of an over-the-top move, you visualize dropping them straight down toward your back pocket as you transition from backswing to downswing.
This downward movement shallows the club’s angle of attack. Picture your hands falling on a steeper, more vertical path while your body begins to rotate. That combination creates space for the club to approach the ball from inside the target line rather than cutting across it. The feeling is counterintuitive at first because golfers who come over the top tend to start the downswing with their shoulders and arms simultaneously, which sends everything outward.
To practice this drill, make slow-motion swings where you pause at the top and consciously drop your hands before anything else moves. Your trail elbow will naturally tuck closer to your side as your hands descend, reinforcing the inside path you developed with the elbow tuck drill. The clubhead will lag behind your hands instead of racing ahead.
This movement pattern directly contradicts the over-the-top sequence. When you cast the club from the top, your hands move out and up. When you drop them toward your pocket, they move in and down. That shift in direction is what puts the club on plane and eliminates the slice-producing outside path.
3. Trail Foot Flare Drill for Better Hip Rotation
The trail foot flare drill addresses a hidden culprit behind over-the-top swings: restricted hip rotation. Many golfers set up with both feet square or perpendicular to the target line, which limits how far the hips can turn through impact. When rotation is blocked, the body compensates by sliding toward the target, pushing the arms and club outside the proper path.
To set up this drill, flare your trail foot (right foot for right-handed golfers) outward by 20 to 30 degrees at address, pointing the toe slightly away from the target. This simple adjustment gives your hips clearance to rotate freely rather than stalling out. When your hips can complete their turn through the hitting area, your torso follows naturally, allowing your arms to swing down from the inside instead of cutting across the ball.
The kinematic sequence changes immediately. Instead of the common fault pattern where the upper body dominates and the hips lag behind, proper hip rotation pulls the shoulders around correctly. Your club drops into the slot behind you rather than looping over the top. Practice this foot position during range sessions, hitting half-swings first to feel the difference in hip freedom. Once the rotational feeling becomes familiar, gradually work up to full swings while maintaining that flared trail foot setup.
4. Deep Backswing Drill to Reset Your Turn
A deeper backswing turn creates the clearance your club needs to approach the ball from the inside rather than cutting across it. When you complete a fuller shoulder rotation away from the target, you establish the space and sequencing that naturally encourages the downswing to shallow rather than steepen.
The key word here is “deeper,” not longer. You’re rotating your shoulders more completely around your spine without extending your arms farther away or letting your wrist hinge collapse. Think of turning your left shoulder (for right-handed golfers) under your chin until you feel mild tension across your upper back. This loaded coil is what allows the downswing to start from the ground up, with your lower body initiating and your arms dropping into the slot.
Practice this drill with half-swings first. Focus on rotating your torso while keeping your lower body stable. You’ll feel the difference between turning versus simply lifting your arms. Once the sensation becomes familiar, the transition from backswing to downswing starts to flow in proper sequence, making it nearly impossible to come over the top. The deeper turn resets your entire swing geometry, giving the club the room it needs to travel on plane.
5. Wrist Position Awareness Training

Wrist position throughout your swing directly influences whether the club arrives on an inside or outside path. When your wrists extend too early in the downswing, often called casting, the clubhead releases outward and approaches the ball from over the top. Proper wrist hinge maintenance keeps the club lagging behind your hands until the correct moment, naturally promoting an inside delivery.
Start by checking your lead wrist at the top of your backswing. It should have a slight cup or neutral angle, not be bowed excessively. As you transition into the downswing, focus on maintaining that wrist angle through the first half of your descent. The sensation feels like delaying the release, keeping your wrists hinged while your body rotates through.
Modern training aids like wrist motion sensors provide instant feedback on your angles throughout the swing, making it easier to identify exactly when casting begins. These devices measure flexion and extension in real time, showing you where your pattern deviates from the ideal path. Without technology, you can practice half-swings while watching your lead wrist in a mirror, ensuring it stays firm rather than flipping early.
The drill works best when you combine awareness with body rotation, let your turn pull the club through rather than throwing it with your hands. This coordination between stable wrists and active body rotation naturally eliminates the over-the-top move.
6. Split-Grip Rehearsal Swings
The split-grip drill separates your hands on the club, usually several inches apart, to magnify the sensation of proper sequencing. Hold the club with your lead hand in its normal position and your trail hand lower on the grip. Make slow, controlled swings focusing on rotating your body first while keeping your arms passive during the transition.
This exaggerated setup makes it nearly impossible to throw the club over the top because separated hands reduce your ability to muscle the downswing with your arms. Instead, you feel your torso and hips initiating the movement while your hands drop naturally into the delivery position. The drill creates a distinct awareness of where your trail elbow should track, staying connected to your side rather than pushing away from your body.
Practice this drill without a ball initially, making rehearsal swings at half speed. You’ll notice how body rotation pulls your arms down on an inside path rather than casting them outward. Once the feeling becomes familiar, gradually bring your hands closer together until you return to a normal grip, maintaining that same sequence. The split-grip sensation helps cement the correct kinematic chain where large muscles move first and the club follows from the inside.
7. Alignment Stick Path Gate Drill

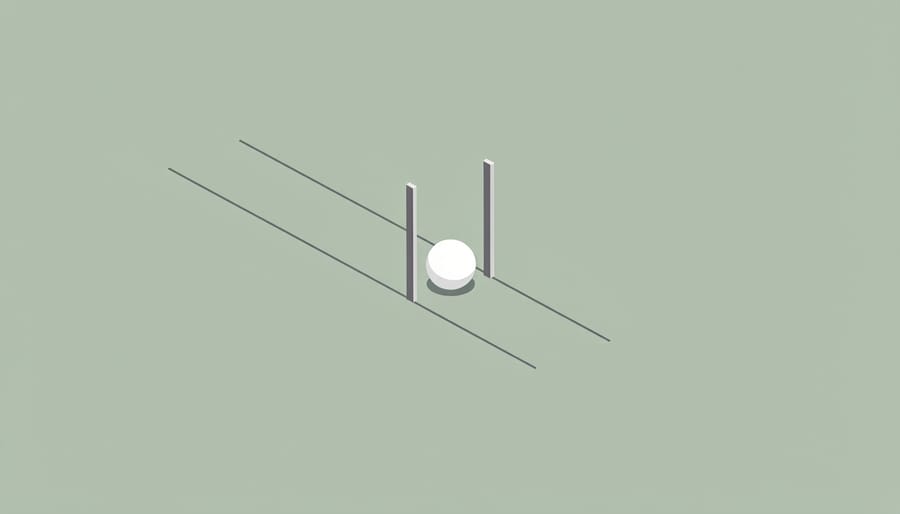
Place one alignment stick on the ground about two feet outside your target line and parallel to it, positioned so it starts just behind the ball. Insert a second stick at an angle behind the ball, pointing toward your trail hip, this creates the gate your club must pass through on the downswing. If your club travels over the top, it will hit the angled stick before reaching the ball, giving you instant physical feedback that your path is too steep and outside.
The beauty of this drill lies in its binary simplicity: you either clear the gate or you don’t. Start with slow, controlled swings, focusing on dropping your hands and club inside the angled stick. You’ll feel the correct shallow approach as your clubhead travels under and around the barrier. Once you groove the sensation without hitting the stick, gradually increase swing speed while maintaining that inside path.
This drill works particularly well on spacious practice ranges where you have room to set up training aids without distraction. The physical boundary removes guesswork, your body learns the correct motion through repetition and immediate correction, making it easier to replicate the proper path when you remove the sticks and play actual shots.
Building Your Practice Routine
Start each session with your highest-ranked drill, the one that addresses your specific swing pattern. If your common swing faults stem from poor hip rotation, the trail foot flare drill becomes your foundation; if your elbow flies away from your body, focus on the elbow tuck first.
Structure your practice this way:
- Begin with ten slow rehearsal swings of your chosen drill, focusing entirely on the feel of the correct movement pattern.
- Add a second drill that complements the first, for example, pair the elbow tuck with wrist position awareness to reinforce both path and clubface control.
- Perform fifteen deliberate repetitions of each drill, alternating between them to keep the session engaging.
- Integrate actual ball striking by hitting five shots while maintaining the drill’s key feeling, then return to rehearsal swings if the pattern breaks down.
Quality practice facilities with ample space let you set up alignment sticks, work through drills without distraction, and build the correct impact position through repetition. The goal is consistency: three focused sessions weekly beats one marathon range day. Track which drill produces the straightest ball flight, then make that your anchor movement for the following week.
Key Details to Know
The seven drills in this guide share common mechanical principles that directly counter the over-the-top pattern. Understanding these underlying factors helps you choose which corrections to prioritize and why they work together.
- Each drill addresses a specific break in the kinematic sequence, shoulder, hip, arm, or wrist movement, that triggers the outside path
- The elbow-tuck and hands-to-pocket drills provide the most immediate path correction because they physically prevent the club from moving outside
- Trail foot position and hip rotation drills fix the lower-body foundation that often causes upper-body compensation moves
- Wrist awareness and grip separation drills retrain the feeling of proper sequencing rather than just repositioning body parts
- Alignment stick gates give instant visual and tactile feedback when you revert to the old pattern mid-swing
- Practice each drill with slow-motion rehearsals first, then half-speed swings, before attempting full shots, rushing the pattern change reinforces old habits
The drills ranked higher in this guide typically produce noticeable ball-flight changes within your first practice session, though ingraining the new movement pattern requires sustained repetition. Most golfers find success by focusing on two drills that address their specific swing fault rather than cycling through all seven randomly.
What to Watch For
Pay close attention to where you make contact on the clubface during practice. Persistent toe hits often signal that you’re still swinging over the top, even when the movement feels different. Video yourself from down-the-line periodically, you’ll spot the over-the-top path far more clearly on playback than you can feel during the swing. Watch for compensations creeping in: many golfers fix the path but then develop a strong grip or closed clubface to manage the new inside delivery, which creates a different set of ball-flight issues. Your divot pattern tells the truth, divots pointing left of target confirm the over-the-top pattern persists, while divots aligned with or slightly right of target indicate you’re delivering from inside. If one drill creates immediate improvement but another makes things worse, that mismatch reveals which specific fault drives your over-the-top move, helping you focus practice time where it matters most for your individual swing.
Common Questions About Fixing an Over-the-Top Swing
How long does it take to stop coming over the top?
Improvement varies widely depending on your current swing pattern and practice consistency. Some golfers feel a difference after just one focused session with proper drills, while building lasting muscle memory typically requires several weeks of regular practice. The key is quality repetition rather than hitting hundreds of rushed balls.
Do I need video analysis to fix this fault?
Video is helpful but not essential for most golfers. You can often feel when you’re coming over the top by noticing if your elbow moves away from your body during the downswing. Video confirmation helps identify exactly where your path goes wrong, but the drills work equally well when you focus on feel and ball flight feedback.
Will these drills work for beginners and experienced players?
Yes, these corrections apply across skill levels because the over-the-top pattern has the same mechanical root regardless of handicap. Beginners might need more repetitions to ingrain the feeling, while experienced golfers often correct faster since they already understand swing sequencing. Choose drills that match your coordination level and build from there.
When should I seek professional instruction instead of self-correcting?
If you’ve tried these drills for a few weeks without noticeable improvement in ball flight, or if you’re unsure whether you’re executing the movements correctly, a qualified instructor can diagnose your specific pattern. Instructors like those certified by major teaching organizations can quickly identify whether your over-the-top motion stems from grip, setup, or sequencing issues that require personalized adjustment.
The beauty of these drills is that you can practice them anywhere with space to swing a club. Many golfers find success working on the elbow tuck and hands-to-pocket movements at home with slow-motion rehearsals before taking them to the range. Track your progress through ball flight rather than worrying about perfect positions, and remember that even small path improvements produce noticeably straighter shots.
Stopping the over-the-top move starts with identifying the specific cause in your swing, whether it’s elbow position, hip sequence, or transition mechanics. Choose one or two drills from this list that directly address your pattern, then commit to focused repetition. These corrections don’t require expensive equipment or complicated analysis; they work on any practice range where you can swing freely and concentrate on the feeling of each movement. Consistent practice builds the muscle memory that transforms these drills into your natural swing path, leading to straighter shots and better ball striking.