

The Duke golf swing refers to a single-plane setup system that positions the golfer’s lead arm on the same plane as the clubshaft at address, creating a simpler, more repeatable motion through impact. Named after its association with instruction methods inspired by Moe Norman’s legendary ball-striking consistency, this approach eliminates the dual-plane compensation most conventional swings require. You can learn the foundational setup in a single practice session, though ingraining the movement patterns typically takes several weeks of deliberate repetition.
What makes the Duke method distinct is its emphasis on geometry at address rather than feel during the swing. By aligning your lead shoulder, arm, and club on a single plane before you even take the club back, you remove the need for complex mid-swing adjustments. The result is straighter shots, more consistent contact, and less stress on your back and shoulders.
This approach appeals to golfers who struggle with timing issues in traditional swings or those recovering from injury who need a biomechanically simpler motion. The single-plane basics center on three setup checkpoints: wider stance, arms hanging naturally from the shoulders, and spine angle that matches your club’s lie angle.
At The Lakes Golf Club, our spacious practice range offers the ideal environment to work through these setup principles without distraction. The scenic backdrop and well-maintained hitting areas let you focus on building the muscle memory this method requires, while our family-friendly atmosphere means you can bring along aspiring junior golfers eager to learn a swing that’s easier on young bodies still developing coordination.
What You’ll Need to Practice the Single-Plane Setup

You don’t need elaborate equipment to start working on the Duke swing’s single-plane setup. The essentials focus on feedback tools that help you see and feel the distinctive positions that separate this method from conventional instruction.
Begin with a full-length mirror or smartphone video setup. The single-plane approach requires specific visual alignment checkpoints, your shoulders, arms, and club shaft form a unified plane at address, and you can’t reliably sense these positions without external feedback. Position the mirror perpendicular to your target line so you can watch your setup from the face-on view that reveals spine angle and arm hang.
Essential tools for mastering single-plane setup:
- Full-length mirror or smartphone with tripod for face-on video analysis
- Alignment sticks or training rods to mark target line and check shaft plane
- Impact tape or foot spray to verify consistent ball position
- Notebook or practice journal to track setup adjustments and feedback
- Access to practice facilities with level ground and adequate space
Alignment sticks prove invaluable for single-plane work. Place one on the ground parallel to your target line, and hold another along your shoulder line at address. This instantly shows whether your shoulders match the shaft plane, the foundation of this method. You’ll catch compensations that mirrors alone might miss.
Club fitting deserves consideration as you progress. The Duke swing’s flatter shoulder turn and distinctive arm position can influence lie angle requirements. While you don’t need custom clubs to learn the setup, clubs that fit your build and swing plane will reinforce proper positions rather than fight them. Many golfers start with their current set and adjust equipment only after establishing consistent fundamentals.
Practice facilities matter more than gear. You need space to repeat the setup without distraction, ideally with level ground that won’t distort your posture. Quality practice areas with mirrors, video stations, or teaching bays accelerate learning, but a quiet corner of any range works if you bring your feedback tools.
Before You Begin: Important Setup Considerations
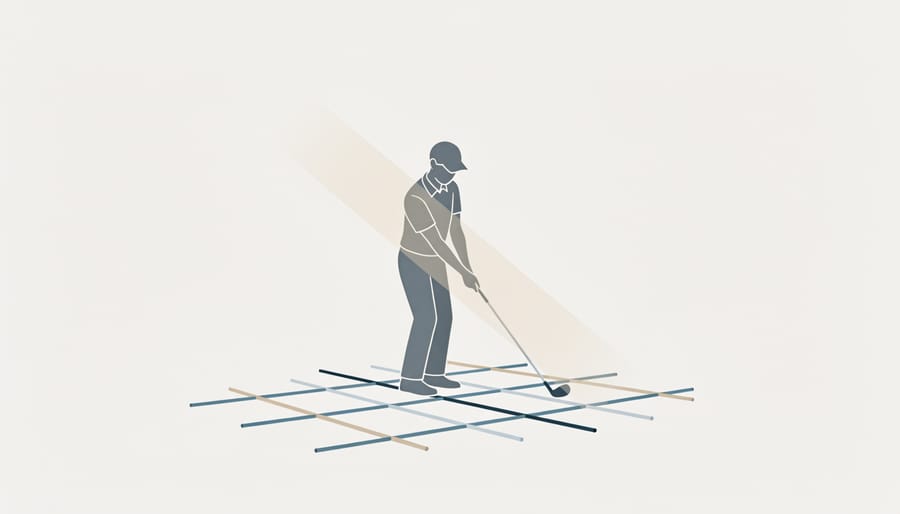
Before diving into the single-plane setup, understand that this method requires patience and a willingness to unlearn conventional habits. Many golfers assume they can transition overnight from a traditional two-plane swing to the Duke approach, but this misconception leads to frustration and inconsistent ball striking. The single-plane foundation demands deliberate, incremental changes to your address position, rushing these adjustments strains muscles and joints unaccustomed to the distinctive posture.
Physical limitations don’t disqualify you from exploring this method, but they do require modifications. Limited hip mobility, for instance, can prevent achieving the ideal forward bend without compensating elsewhere in your setup. Shoulder flexibility directly affects your ability to hang both arms on the same plane as the shaft, forcing the position risks rotator cuff strain.
Stop immediately if you experience sharp pain, particularly in your lower back or lead shoulder, during setup practice. Discomfort signals your body needs more time to adapt or that your current flexibility doesn’t support the position safely. Consider working with an instructor certified in single-plane methodology when you’re starting out, especially if traditional lessons have ingrained conflicting movement patterns. An experienced eye identifies compensations you can’t feel or see on your own, preventing the development of flawed fundamentals that undermine the entire system.
The Single-Plane Setup Process: Step by Step
Step 1: Establish Your Stance Width and Ball Position
Start with your feet shoulder-width apart, measured from the inside edges of your heels. This narrower stance than conventional instruction uses might feel cramped at first, but it’s essential for the single-plane method. The compact base limits lower body motion and keeps your shoulders rotating on the same plane as your club shaft throughout the swing.
Position the ball just forward of center in your stance, roughly one to two inches ahead of the middle point between your feet. This placement works for irons and woods alike in the Duke approach, unlike conventional setup where ball position shifts dramatically between clubs. The consistent location supports the single-plane concept by keeping your impact point stable.
Your weight should favor your lead foot slightly, around 55-60 percent. This forward bias differs from the conventional 50-50 distribution because the single-plane swing doesn’t require the lateral shift traditional methods demand. You’re already positioned where conventional swings move to at impact.
Stand close enough that your arms hang naturally without reaching. If you can fit more than a hand’s width between the club shaft and your lead thigh at address, you’re too far from the ball. This proximity is another Duke swing hallmark that feels unusual compared to conventional distance, but it’s crucial for maintaining the arm-shaft relationship that defines single-plane mechanics.
Step 2: Set Your Spine Angle and Posture
With your stance established, the next critical element is achieving the forward spine tilt that distinguishes the single-plane approach. This posture allows your arms to hang on the same angle as your club shaft, the defining characteristic of the Duke method.
Start by hinging forward from your hips, not by rounding your shoulders or slumping your back. Imagine a straight rod running along your spine from your tailbone through the back of your head. As you tilt forward, maintain this straight line. The angle you’re seeking puts your shoulders slightly ahead of your hips when viewed from the side.
How much tilt? Enough that when you let your arms hang completely relaxed, they fall naturally along the same plane as your club shaft resting on the ground. With a seven iron, this typically means your spine tilts about 25-30 degrees forward from vertical. Shorter clubs require slightly more tilt; longer clubs slightly less.
Avoid the common mistake of creating tilt by bending your knees excessively or tucking your chin. Your knee flex should be athletic but modest, just enough to unlock the joints. Keep your chin up so there’s space between it and your chest. This allows proper shoulder rotation later.
The correct sensation is standing tall through your spine while tilted forward at the hips, creating space for your arms to swing freely along a single plane.
Step 3: Position Your Arms and Hands
With your spine angle and stance established, the arm and hand position completes the single-plane foundation. In the Duke swing, your arms hang straight down from your shoulders without reaching or pulling inward, imagine a plumb line from each shoulder socket directly to your hands.
Let both arms relax completely at address. Your lead arm (left for right-handers) should form a relatively straight line with the club shaft, creating minimal angle at the wrist. This differs sharply from conventional setups where the hands sit higher and create more wrist cock at address. Your trail arm bends slightly at the elbow, tucked closer to your body than in a traditional swing.
Hand position sits lower and farther from your body than you’re probably accustomed to. The butt of the club points more toward your belt line rather than your lead hip. Many golfers initially feel their hands are “too low,” but this sensation confirms you’re on the right track.
The most common error? Lifting your hands to a familiar conventional height, which immediately breaks the single plane. Another mistake is tensing your arms or gripping too tightly, preventing the natural hang that makes this method work.
Check that your hands haven’t drifted toward your body. They should align roughly with the middle of your thighs, maintaining that straight-line relationship between your lead arm and the shaft throughout your setup.
Step 4: Align Your Shoulders on the Single Plane
With your spine angle, arm position, and posture established, shoulder alignment completes the single-plane foundation. This step distinguishes the Duke method from conventional instruction and demands careful attention.
Stand behind your setup and imagine a line extending from your club shaft through your hands. Your lead shoulder should sit on this same plane, not above it as in traditional swings. This creates the characteristic “single plane” where your shoulders, arms, and shaft form one continuous angle at address.
To achieve this alignment, let your lead shoulder drop slightly lower than in a conventional setup while your trail shoulder rises. The sensation feels like tilting your shoulder line to mirror the shaft angle. Many golfers initially resist this position because it contradicts years of “level shoulders” instruction, but this tilt is precisely what allows the arms to swing naturally on plane throughout the motion.
Check your alignment by placing a club across your shoulders at address. The shaft should point parallel to your club on the ground, both angled on the same plane. If your shoulder club points more horizontally, you haven’t achieved single-plane alignment.
This shoulder position eliminates the need for complex compensations during the swing. When your shoulders match the shaft plane from the start, maintaining that relationship through impact becomes dramatically simpler, producing the consistency Moe Norman demonstrated.
How to Check Your Setup and Measure Progress

Once you’ve set up your single-plane position, verification becomes essential. The Duke swing demands precise alignment, and even small deviations can compromise the entire method. Start by checking three critical points: your shoulder alignment relative to the shaft plane, the angle formed between your lead arm and the club shaft, and your spine tilt from a down-the-line perspective.
Video analysis provides your most reliable feedback. Position your phone or camera directly down the target line, about waist height, five to six feet away. Record your address position from this angle, then draw a line along your club shaft in the playback. Your lead shoulder should sit on this same line. If your shoulder sits above the line, you haven’t achieved single-plane positioning yet. From the face-on view, check that your lead arm and the shaft create one continuous line without a break at the wrist.
Mirror work accelerates your learning between range sessions. Set up perpendicular to a full-length mirror so you’re looking at your down-the-line view. The visual feedback is immediate. You’ll spot shoulder misalignment or excessive spine tilt instantly, whereas those errors feel normal without visual confirmation.
For consistency testing, use the split-hand drill. Separate your hands by two inches on the grip and make slow-motion swings. The single-plane setup naturally maintains the relationship between your arms and the shaft through impact. If your hands want to come together or the club feels awkward, your setup likely needs adjustment. This drill exposes setup flaws that don’t show up in static positions.
Track your progress by recording the same down-the-line view weekly. Compare shoulder alignment across sessions rather than trusting feel alone. The single-plane position often feels unusual at first, making objective measurement crucial. As your setup becomes consistent, you’ll notice the club returns to perfect impact more reliably, with less manipulation required during the swing itself.
Refining Your Setup Through Practice
Once you’ve nailed the setup position, consistency comes from repeating it until muscle memory takes over. Start each range session by rebuilding your setup from scratch, don’t rush into hitting balls. Spend five minutes verifying your stance width, spine angle, arm hang, and shoulder alignment before you swing. This deliberate reset prevents bad habits from creeping back in.
At the range, work through progression drills that preserve your setup under motion. Begin with half-swings, focusing solely on maintaining your spine angle and single-plane arm path. If your setup collapses during these shorter swings, you’re not ready for full shots. Gradually extend to three-quarter swings, checking that your shoulders stay on plane throughout. Film yourself from down-the-line periodically, your phone propped against your bag works fine, and compare your impact position to your address position. They should look nearly identical in a proper single-plane motion.
Revisit the fundamentals whenever your ball-striking becomes inconsistent. A sudden pattern of thin or heavy contact usually signals setup drift, not a swing flaw. Strip back to static posture checks before assuming you need to change anything else. Quality practice facilities make this refinement process more effective. Access to alignment aids, mirrors, and proper turf conditions lets you groove the position without compensating for poor surfaces.
For advanced feedback, facilities like the 3D Golf Center offer technology that tracks your setup metrics and swing path simultaneously. This data reveals whether you’re actually maintaining the single plane or whether compensations are hiding in your weight transfer. The single-plane method rewards patient, systematic practice more than volume.
Common Questions About the Duke Swing Setup
Is the single-plane setup harder to learn than a conventional swing?
The setup itself is straightforward once you understand the positioning, but it requires unlearning conventional habits. Most golfers find the distinctive shoulder alignment and arm hang feel unusual at first, though the method often proves simpler once internalized.
Can I switch between single-plane and conventional setups?
Mixing the two approaches typically creates inconsistency since the fundamentals contradict each other. Committing to one method allows your body to develop the muscle memory needed for reliable ball striking.
Will this setup work with my current clubs?
Standard clubs can work initially, though the single-plane method often benefits from slightly more upright lie angles. Test your setup with your existing equipment before considering adjustments, as many golfers achieve good results without immediate changes.
How long before the setup feels natural?
Expect two to four weeks of consistent practice for the position to feel comfortable, though individual timelines vary. Quality practice time at a facility with proper feedback tools accelerates the learning curve compared to occasional range sessions.
These questions reflect the most frequent concerns golfers encounter when adopting single-plane principles. The setup’s simplicity is both its strength and its challenge, the positions are clear, but your body resists change. If you’re struggling beyond normal adjustment discomfort, reviewing the fundamentals can help fix a bad swing pattern before it becomes ingrained. Working with a mirror or recording your setup from multiple angles reveals subtle deviations that feel correct but misalign your foundation. The single-plane method rewards patience during this learning phase, as rushing through setup details undermines the consistency the system promises.